by Nick Gressle
In the first part of the series I discussed the background of the concept as well as the basics of building the board.
In Part II I want to spend some time talking about creating the Taflstones, and the drag and drop actions that define the game play.
And in Part III (coming soon) we will discuss the How To document that comes with the game.
Applications for Creating the Game Pieces (Taflstones)
I tend to work in Adobe Illustrator™ as my drawing program for a variety of reasons which have to do with illustration style, export speed and file size.
In this article I don’t want to spend much time discussing my Adobe Illustrator process, but if you want to discuss this with me sometime feel free to contact me.
I also work in Photoshop when I feel the style of the illustration will require that tool. Usually if I am looking for a softer feel with more subtle textures.
Both applications export a .png format which is what I will use for character elements in Hype.
So bottom line work in an application that you feel will get you the
result you want.
The Taflstone Characters
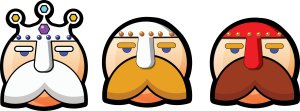
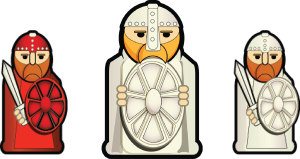
Since Hnefatafl has essentially 3 distinct types of player pieces (Tafl stones) it is not the most difficult art creation for elements.
There is 1 king and 1 type of soldier in 2 colors.
You could get more creative and have individual soldier characters each with individual faces etc., but that would add to the complexity of the build and the file size and for this type of game I chose to follow a leaner design approach.
So I created the King Character and then I created the soldier based on the king yet smaller, and then created a duplicate in red.
.png format and export options
Why the .png format?
Primarily for me the .png format is the best because of the transparent background. Since your taflstones will be overlaying board elements (squares, removed pieces cups, background) you do not want the typical opaque white background square that surrounds a jpg image traveling with it as you move your taflstones.
Some people use .svg Scalable Vector Graphics and I see the benefit in this from file size and scalability and I want to experiment with that in my next title.
Exporting:
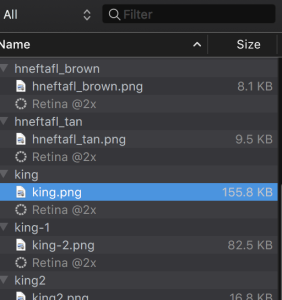
When exporting your images from your drawing program you want to be aware of the rules for the varying screen resolutions, a.k.a Retina screens.
Since these are higher resolution and since the iPad can come in a few different sizes these days you want your images to scale up for the viewer so that they look as nice as they can when viewed on their personal screen.
To do this there are several methods for creating the images at export to accommodate this need.
The goal of any export workflow is to generate 1x images for standard resolutions and 2x images for the retina resolution.
Hype Professional will do this for you if you check this off in the application.
For a very good explanation on retina display prepared imagery check out Daniel Morgan’s Hype Blog Post on retina imagery.
Pixels vs. Bandwidth: Tumult Hype documents and Retina displays (iPhones, iPads, and the Retina Macbook Pro)
And this link at Apple’s Developer Connection on High resolution graphics.
https://developer.apple.com/high-resolution/
Why not just import the image?
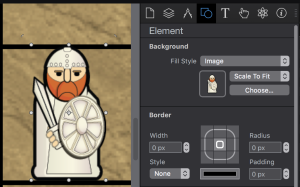
Typically you can insert an image element into Hype just fine. However it is nice to sometimes use the basic shape elements and then use an “image fill”.
This allows you to use the bounds of a rectangle or circle to keep your image in a preset size that then can be aligned with other simple element shapes.
I also wanted to take advantage of Hype symbols to streamline my build and help with file size as well.
To do this with an element that you have already created in Hype is very easy.
1. Just select the element that you want to convert to a symbol.
2. Then select the Symbol Tool item and then select “New Symbol
From Selection”.
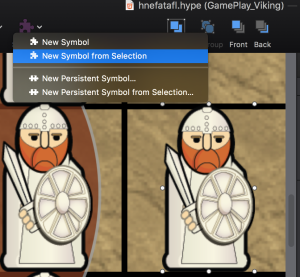
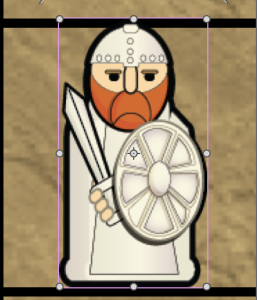
3. You will now notice that your element has a purple border
around it.
Secondly, I wanted to create several board variations and swapping out the background image of the square element, and then making it a symbol I was able to speed up the population of each board variation.
*Note Symbols are instances of an object so if you change a symbol all instances will change. In this case all of the taflstones. So plan your symbol execution early in your development process.
“Drag and Drop”
I am fairly simple in the things that make me say “WOW!” and the one feature that made life so much simpler for me was Hype’s Drag and Drop actions.
Being able to spend more time on illustration and design, and less on writing a script and attaching that script in code to references of an image is what made Hype my go to tool for so many applications.
How To:
1. Select the element for which you wish to apply a drag and drop action.
2. Then go into your inspector panel and select the actions icon
3. Next go to the onDrag Action.
4. In the submenu select “Control Element Position”
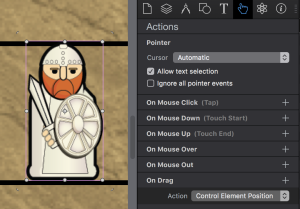
This will allow the user to select the image and drag it,and drop it anywhere in your application.
For a board game it is ideal.
This is also an action that has a lot of power built into it.
Not only can you do the simple position control but you can use it to control timelines, add a function to it to identify where it is dropped, and to change other elements.
This is one of those Hype features that can give your applications all sorts of fun personalities.
Come back soon for Part 3 where we will discuss creating the “how to manual” which is essentially an animated book with page flips and simulated game play!
Written by: Nick Gressle Website See the App


